How to Secure Your Hay Cover
One of the best ways to secure your hay cover is by using the Schilder Fixx fastener. The big advantage? You can fix the cover without punching holes, which helps extend its lifespan even more. Proper securing makes a huge difference, so be sure to also follow the installation tips for the best results.
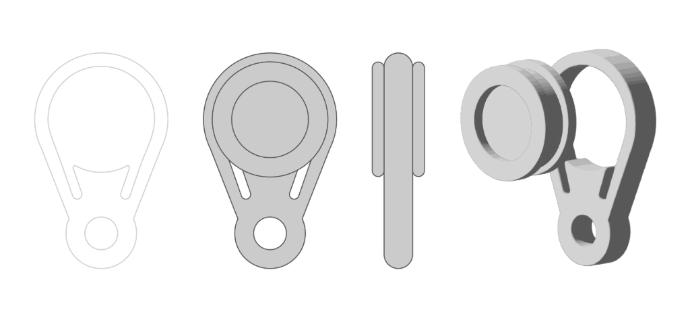
Securing the Hay Cover with Schilder Fixx
- First, pop out the inner button of the Schilder Fixx fastener.
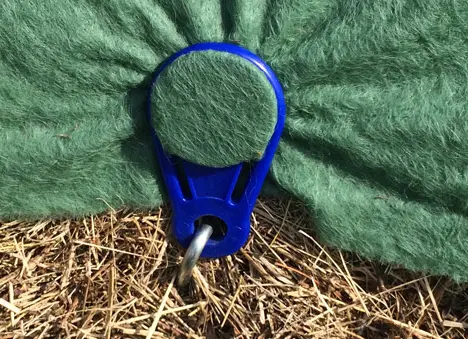
- Place the button under the hay cover where you want to secure it.
- Wrap the ring around the button to secure it.
- Insert the ring’s tongue into the groove of the button.
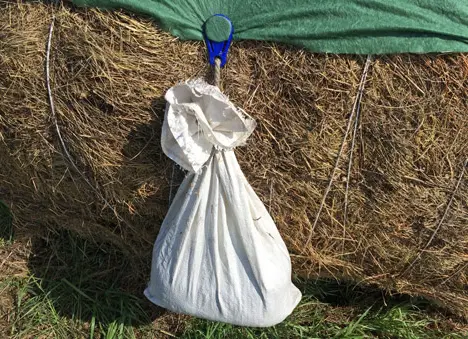
- Insert a metal spike into the hole at the bottom of the ring, or hang a weight like a sandbag on it using a rope.
Removing the Schilder Fixx from your hay cover
- Remove the metal spike or the tied weight from the Schilder Fixx securing hole.
- Pull the tongue out of the button groove to release it.
- Use the tongue to unhook the ring from the button.
- Remove both the ring and the button.
Securing the Hay Cover
After securing the Schilder Fixx fastener to your hay cover, use one of the methods mentioned above to fasten the cover. In both cases, it’s important that the cover is tight—but don’t overdo it. Just tighten enough to reach about a 45° angle.

Alternative Securing Methods
You can also secure the hay cover DIY-style using a U-shaped stake and a wooden board:
- Push a U-shaped metal spike through the hay cover and hammer it in almost all the way.
- Place a wooden board in the bend of the metal spike to help distribute the pressure.
- Drive the spike all the way in, pressing the wooden board firmly against the bale.
Always use a wooden board when securing your hay cover this way. Without a board under the spike, the pressure concentrates on the puncture point, which can shorten the cover’s lifespan. In extreme cases, the cover might even tear.